Displaying items by tag: next
Introduction
The history is an important part of the requirements management tool and the purpose of this article is to explain functions and capabilities of DOORS Next for working with history of requirements.
Artifact revisions
On the very basic level history of requirements management items in DOORS Next is organized on artifacts level and is presented as revisions and audit history. This information is accessible for artifacts via ‘Open history’ action in the menu (Figure 1).

Figure 1
The first tab you see when you open history is ‘Revisions’, it is splitted on ‘Today’, ‘Yesterday’, ‘Past week’, ‘Past month’ and ‘Earlier’ sections which include different versions of an artifact and baselines of project area or component. When you switch to the ‘Audit history’ tab you see only versions of a current artifact with explanation of actions performed on it and changes which were created with information on date and time and author of it.

Figure 2
Revisions can be restored to the current state. To revert the requirement to a previous state you need to use artifact menu and select ‘Restore’ action (Figure 3).

Figure 3
History in attributes
Another source of history of an artifact are system attributes, which preserve information on date and time of creation and modification of an artifact and a user who created and modified an artifact. These attributes are updated by the application on creation of an artifact (Created On for date and time of creation and Created By for username) and Modified On and Modified by for the latest modification. Additionally, if you use ReqIF import to add artifacts, attributes with the prefix ‘Foreign’ will show you related information from the source (Figure 4). Attributes with prefix ‘Foreign’ will display timestamps and usernames from the source of imported requirements.

Figure 4
Of course, a revision list and attributes of a single artifact is not enough to manage requirements history, so versions of artifacts are aggregated to baselines. The first kind of baselines is a DOORS Next baseline, in other words it can be explained as a snapshot which includes certain revisions of artifacts. Baselines are created to preserve some agreed state of requirements, artifacts cannot be edited in a baseline (Figure 5).

Figure 5
Module revisions
When we are talking about artifact revisions It is meaningful to mention that module revisions are specific - they are created when module structure is changed (a set and / or order of included artifacts) or attributes of a module as an artifact itself. So when you edit an artifact in module context without changing position of this artifact in module (Figure 6, marked with green color) - you do not create new revision of module automatically. Only insertion of new artifact, editing module attributes (Figure 6, marked with purple) or moving artifacts within a module will update attributes of a module with date & time and contributor name. To capture the complete state of a module you need to create a DOORS Next baseline.

Figure 6
History in streams and changesets
DOORS Next with configuration management capabilities has more options to manage history of requirements. First of all - streams, which allow you to have parallel timelines for different variants of requirements. All requirements in DOORS Next have their initial stream, which is the default timeline for requirements changes. DOORS Next has an option to create a parallel timeline using additional streams, which is mostly used to manage variants of requirements.In this case usually some existing version of requirements is used as an initial state for a new stream. And changes of artifacts in a new stream will not affect the initial stream - revisions of artifacts created in a new stream are visible only in this stream unless the user initiates synchronization (see Figure 7, the module is shown in two different streams - stream names and changed artifact are coloured with purple). During synchronization the user has options with merging approaches, and one of them is using changesets, which are explained below.

Figure 7
Changesets are another kind of data set in DOORS Next which can be observed in the audit history. There are two types of changesets - user created changeset (name of changeset in this case is specified by user) and internal changeset, which is a reference for changes in the audit history. Internal changesets can be found in the audit history and can be also used as an option to deliver changes across streams. Created by user changesets aggregate small changesets automatically created by DOORS Next, which can be found in audit history and in the merging menu when you deliver changes from one stream to another. Both types of changesets can be found on stream’s page, and if a stream is allowed to be edited only via changesets - it means, users are forced to create a changeset to edit requirements in a stream - a list of changesets of a stream gives you a good representation of history for a stream (Figure 8).

Figure 8
Baselines
Another functionality to manage history is Global Configuration baseline. When you enable DOORS Next project area for configuration management, links between requirements in different components are created via Global Configuration stream - you need to switch to Global Configuration context to create a link across DOORS Next components and also to see such links. As each component is baselined independently in DOORS Next, in order to preserve cross-component linkage state you need to create a Global Configuration baseline. When you perform this action, baselines are created on each component level automatically and included to a Global Configuration baseline. Switching to this baseline in the future will show you the exact state of linking at the moment of global baseline creation - proper links between proper revisions of artifacts (Figure 9).

Figure 9
Compare configuration
DNG functionality of configuration comparison can be used between streams, baselines and changesets and provides overview of changes in history and/or across variants on several layers - type system (data model), folder structure, and the data itself (including module structure, artifacts text and attribute values, links) with an option to filter changes (Figure 10).

Figure 10
Tips and tricks
- As mentioned above, baselines are created on component level (or project area level if project area is not enabled for configuration management). When number of baselines grows, some maintenance of baselines is required - to shorten the list of baselines, some of them need to be archived
- To help users with navigation in list of baselines we provide special widget, which filters from the flat baseline list those baselines which were created in a certain module context
- Links operations to not modify artifacts, link changes can be found in configuration comparison results
- To support filtering history events in a module scope Softacus provides special widget, which allows to get list of artifacts modified in a module scope
- Using change sets to update streams with link from change sets to Engineering Workflow Management work items adds context for history with explanation of a reason for changes

Introduction
IBM® Rational® DOORS® Next Generation is consistently one of the best requirements management tools out there. One of its biggest strengths is the opportunity to expand its capabilities by the people using it, so that they can utilize it to its fullest. Whether you are someone who already uses IBM® Rational® DOORS® Next Generation on a regular basis or someone who is considering using it, the knowledge of how you can optimize your work environment is the key to peak productivity in the workplace.
Purpose of the article - OS Gadgets
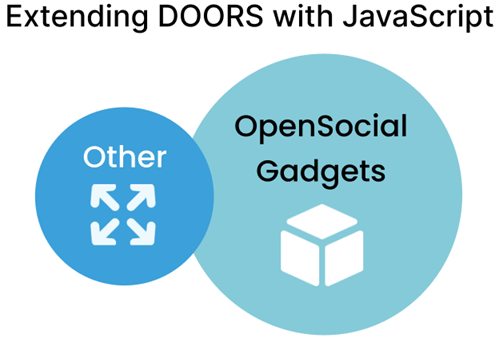
This article will be delving into how you can extend IBM® Rational® DOORS® Next Generation behavior with JavaScript, in particular we will be focusing on OpenSocial gadgets (widgets that are created following OpenSocial standards), as DOORS Next offers its users a JavaScript API which enables OpenSocial gadgets to automate intricate operations and work with the requirement data.

Here is how an OpenSocial Gadget is defined:
It can be defined in an XML file composed of two parts. The first one is Preferences, which determines key characteristics and gadget dependencies. The second one, Content, mainly deals with business logic and user interface. The JavaScript API makes it possible for the gadgets to be utilized to their fullest extent.
JavaScript API
First of all, let’s look at what options the JavaScript API opens for OpenSocial Gadgets. It allows the modification and viewing of artifacts, in particular to view and write attributes and acquire the current configuration context and user details. Working with links and the option to discard, add, or design artifacts in a module is also a part of this feature.
Another feature involves viewing and designating the current artifact selection and reacting to when the artifact has been interacted with (opened, selected, saved…)
When it comes to processes that are more compute-intensive, they can be performed by external services that the JavaScript API enables to assign to the task.
Furthermore, the API offers a User picker and an Artifact picker.
Adding and creating OpenSocial Gadgets
All of the features provided by the JavaScript API are utilized by the aforementioned OpenSocial Gadgets to help you get the most out of DOORS Next, save time and simplify work processes.
How can you start using OpenSocial Gadgets? Well, you can either add gadgets that already exist to your Mini Dashboard (a compact dashboard that you can have constantly on hand - pinned to the web UI) or you can create your own OpenSocial Gadgets.
Adding an already existing OpenSocial Gadget to your Mini Dashboard is a relatively simple way to make use of the JavaScript API and OpenSocial Gadget synergy as it requires marginally less effort compared to creating one, however creating your own one has the added benefit of having a gadget which is tailored to your specific needs. If you want to go the way of adding an OpenSocial Gadget to your Mini Dashboard, you will firstly have to work with your browser, then with a requirements module and lastly with the Mini Dashboard itself, this is also where you will spend most time during the process.
Creating a new OpenSocial Gadget can take significant effort and proficiency in JavaScript, especially if it's for complex tasks but the hard work pays off once you can actually utilize it since it will be engineered to do exactly what you need it to do.
While the entire creation process is too complex to be described in this short article, it can be boiled down to six essential steps.
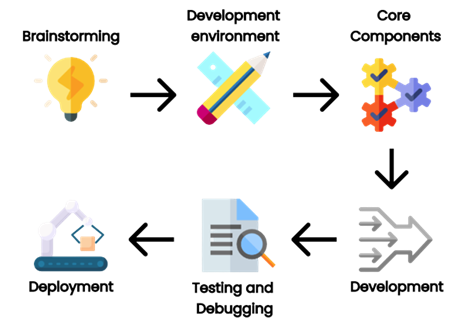
The first step will be the most important for the development as you have to establish the goal for its functionality and what will it be used for. This is crucial because having a clear aim in mind will greatly help you with the creation and implementation process.
For the second step, you will need to acquire the tools and libraries essential for developing your gadgets (e.g. web server, text editor, OpenSocial container). In other words, you will need to put your development environment in order.
The third step includes making the gadget XML file. This will be where the behavior and properties of your OpenSocial Gadget will be determined. CSS, HTML and JavaScript files, the name and description of the gadget, in other words, the core components of your gadget that will ensure that it works.
Now comes the development part of your creation process, as you will have to develop the CSS, HTML and JavaScript files themself, which will be used to make the layout and functionality of your gadget.
For the fifth step you will move onto one of the most critical development stages - testing and debugging, through which you can ensure that your gadget is working as intended and remove any problems that may arise. You can do this in DOORS Next Generation or in an OpenSocial container.
Finally, you should now be at the end of the journey of developing an OpenSocial Gadget and should be able to deploy it to DNG. You will most likely be doing this by uploading it to DOORS Next Generation. Then you can finally include it in a dashboard or wherever you will be able to/need it.
Additional OS related activities
Now the only thing left is to look at some additional useful information that you should know about extending DOORS Next with JavaScript. One such is knowing that you can add OpenSocial Gadgets to the Widget Catalog. This makes life much easier for you as it allows you to quickly and easily search up any gadget, which you can then add to DOORS Next if you wish to.
Another thing is, that a situation can occur when a widget makes an external request (call to an external server). If this happens, what you have to do is enable Cross Origin Resource Sharing if you wish for the request to go through.
Conclusion
In conclusion, if you want to get the most out of IBM® Rational® DOORS® Next Generation, you should definitely consider extending it with JavaScript. Since it already provides a JavaScript API that you can use to optimize and ease workload through OpenSocial Gadgets, extending IBM® Rational® DOORS® Next Generation in ways that we have described will without a shadow of a doubt provide you with a better experience when using the product.
Option 1: Project Area or Component Template
How to:
- In the current project go to Project or Component Properties > Templates
- Create New
- Click on data which you want to copy (if you click on Artifact then all artifact will be part of the template
- Create a new project area or component and use a template for creation (template must be downloaded and uploaded if you are porting to a new server)
Advantages:
- Works also for porting to a new server
- Links between artifacts are kept
- project area properties are automatically saved
- Are links within the project area/component are kept